 |
|
 版权声明:本文为博主原创文章,未经博主允许不得转载。
原文地址:https://robotkang.cc/24324.html
版权声明:本文为博主原创文章,未经博主允许不得转载。
原文地址:https://robotkang.cc/24324.html
需求描述:
在PS中用脚本实现将不同的二维码和文字批量处理到相同的一张图片上
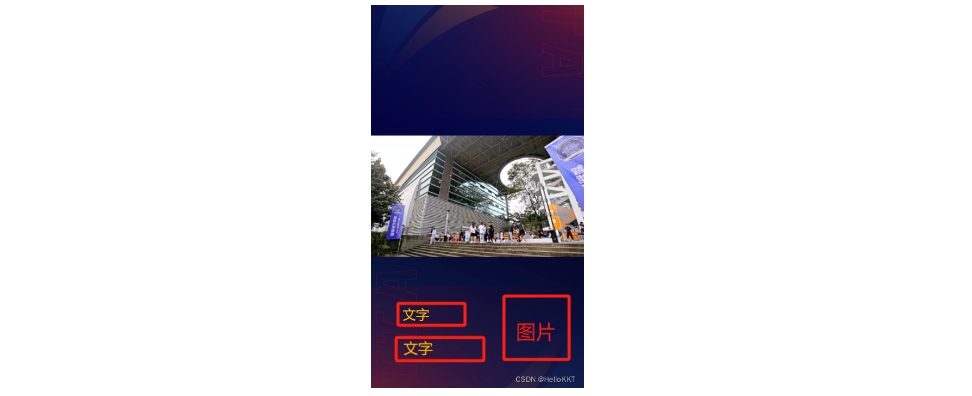
结果呈现:

实现步骤:
请注意,这个过程假设所有的二维码都是同样的大小,而且你想要将它们放在同样的位置。如果你需要将二维码放在不同的位置,或者如果你的二维码有不同的大小,那么你可能需要创建多个动作,或者手动调整每个二维码。
在Adobe Photoshop中使用JavaScript脚本的步骤如下:
创建脚本:首先,你需要使用任何文本编辑器(如Notepad,Sublime Text,VS Code等)创建一个JavaScript文件。在这个文件中,你可以写入你的Photoshop脚本。保存这个文件时,你需要使用.js作为文件扩展名。当然这里你可以直接使用我的脚本,只需更换一下相应文件的路径。
打开Photoshop:启动Adobe Photoshop程序。
运行脚本:在Photoshop中,点击左上角的 “文件(File)” 菜单,然后选择”脚本(Scripts)” ,点击下方的 “浏览(Browse)” 。在弹出的文件选择对话框中,找到并选择你的.js脚本文件,然后点击Open按钮。这将会运行你的脚本。

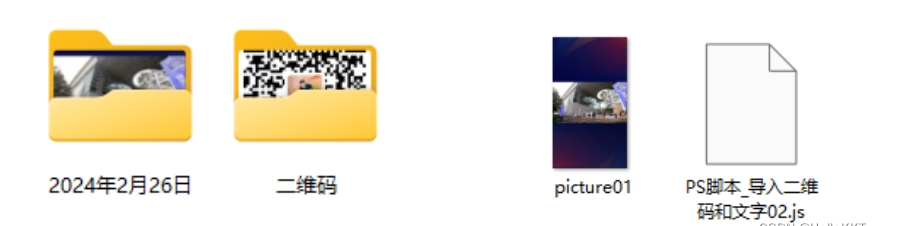
相关的文件夹:
脚本代码:
// 假定CSV文件和图片路径已经准备好
var csvFile = new File("C:/Users/Hayato/Desktop/makex/000.csv");
csvFile.open("r");
var csvContent = csvFile.read();
csvFile.close();

// 将CSV内容转换为数组
var lines = csvContent.split("\n");

var textProperties = [
    { fontSize: 12, x: 2820, y: 263, font: "FZLTZHK--GBK1-0" }, // text1编号
    { fontSize: 31, x: 1440, y: 1270, font: "FZLTTHK--GBK1-0" ,bold: true}, // text2 赛项 x: 1530 ,bold: true
    { fontSize: 25.5, x: 1800, y: 1843, font: "FZLTZHK--GBK1-0", bold: true}, // text3 队伍名称
    { fontSize: 14, x: 1300, y: 2020, font: "FZLTZHK--GBK1-0", bold: true}, // text4  学校
    { fontSize: 14, x: 1300, y: 2140, font: "FZLTZHK--GBK1-0", bold: true}, // text5 老师
    { fontSize: 14, x: 1300, y: 2258, font: "FZLTZHK--GBK1-0", bold: true}, // text6 选手
    { fontSize: 70, x: 1820, y: 1580, font: "FZLTTHK--GBK1-0", bold: true} // text7 奖项 x: 1820,x: 1350
];

// 通过字体名称查找字体对象
function findFontByName(name) {
    var fonts = app.fonts;
    for (var i = 0; i < fonts.length; i++) {
        if (fonts[i].name === name) {
            return fonts[i];
        }
    }
    return null;
}

// 添加文本层函数
function addTextLayer(docRef, text, properties, colorHex) {
    // 添加文本层
    var textLayer = docRef.artLayers.add();
    textLayer.kind = LayerKind.TEXT;

    // 设置文本属性
    var textItem = textLayer.textItem;
    textItem.contents = text;
    textItem.position = [properties.x, properties.y];
    textItem.size = properties.fontSize;

    // 设置字体
    var font = findFontByName(properties.font);
    if (font) {
        textItem.font = font;
    } else {
        // 如果找不到字体,则使用默认字体
        textItem.font = "Arial";
    }

    // 如果需要加粗,可以在这里检查并应用
    if (properties.bold) {
        textItem.fauxBold = true; // 将 fauxBold 属性设置为 true,模拟加粗效果
    }

    // 设置文本颜色
    var textColor = new SolidColor();
    if (colorHex) {
        textColor.rgb.hexValue = colorHex;
    } else {
        textColor.rgb.hexValue = '51483A'; // 默认颜色
    }
    textItem.color = textColor;
}

// 定义一个空数组来存储生成的图片名字
var generatedImageNames = [];

// 处理每一行数据
for (var i = 0; i < lines.length; i++) {
    // 打开目标图片
    var targetFile = new File("C:/Users/Hayato/Desktop/makex/2023wrc.png");
    var docRef = app.open(targetFile);

    var line = lines[i].split(",");

    // 检查数据完整性
    if (line.length < 7) {
        // 数据不完整,跳过该行
        continue;
    }

    var texts = line.slice(0, 7); // 获取前7个文本项

    // 逐个添加文本层
    for (var index = 0; index < texts.length; index++) {
        var text = texts[index];
        if (index === 6) { // text2, text3, text7
            addTextLayer(docRef, text, textProperties[index], 'cba05f'); // 金色
        } else {
            addTextLayer(docRef, text, textProperties[index]);
        }
    }

    // 保存处理后的图片为PNG格式,并以text3的文字命名
    var fileName = "C:/Users/Hayato/Desktop/makex/Spark03/Spark03_" + texts[2] +"_"+ texts[0] + ".png";
    var saveFile = new File(fileName);
    var pngOptions = new PNGSaveOptions();
    docRef.saveAs(saveFile, pngOptions, true, Extension.LOWERCASE);

    // 添加文件名到数组
    generatedImageNames.push(texts[2]);

    // 关闭当前文档
    docRef.close(SaveOptions.DONOTSAVECHANGES);
}

// 循环结束后,写入CSV文件
if (generatedImageNames.length > 0) {
    var outputFile = new File("C:/Users/Hayato/Desktop/makex/Spark03/GeneratedImageNames.csv");
    outputFile.open('w');
    outputFile.writeln("Image Names");
    for (var i = 0; i < generatedImageNames.length; i++) {
        outputFile.writeln(generatedImageNames[i]);
    }
    outputFile.close();
}
 支付宝打赏
支付宝打赏  微信打赏
微信打赏